Regular cleaning of the swimming pool is the most important requirement to do. For those with cartridge pool filter systems and other pools, filters should be kept clean all the time. Keeping your swimming pool clean every day will help make it look good and assure people that they are healthy and safe during their swimming.
Here is the easy step-by-step guide on cleaning a cartridge pool filter that you must follow to keep your pool clean.
Step 1: Turn off the System

Rule No.1 before starting cleaning the swimming pool, make sure that the pump is turned off. Do not start working while the pool equipment is still running.
Next, opening the air relief valve allows the air to bleed out slowly. Never attempt to open the filter tank while there is pressure in the system. It may cause damage to the filter and, worse, may cause personal injury.
Step 2: Open the Filter Tank
Next, remove the clamp lid from the tank. Newer versions of filter tanks use o-rings to secure the upper and lower pieces together. You can easily remove the o-ring by pressing up on the release tabs and turning counter-clockwise.
You should also check if your filter is an older model that has metal clamps attached with screws. If this is the case, make sure to check the manual or contact your local pool services to help you remove the metal clamp.
Step 3: Remove the Cartridge/s from the Tank
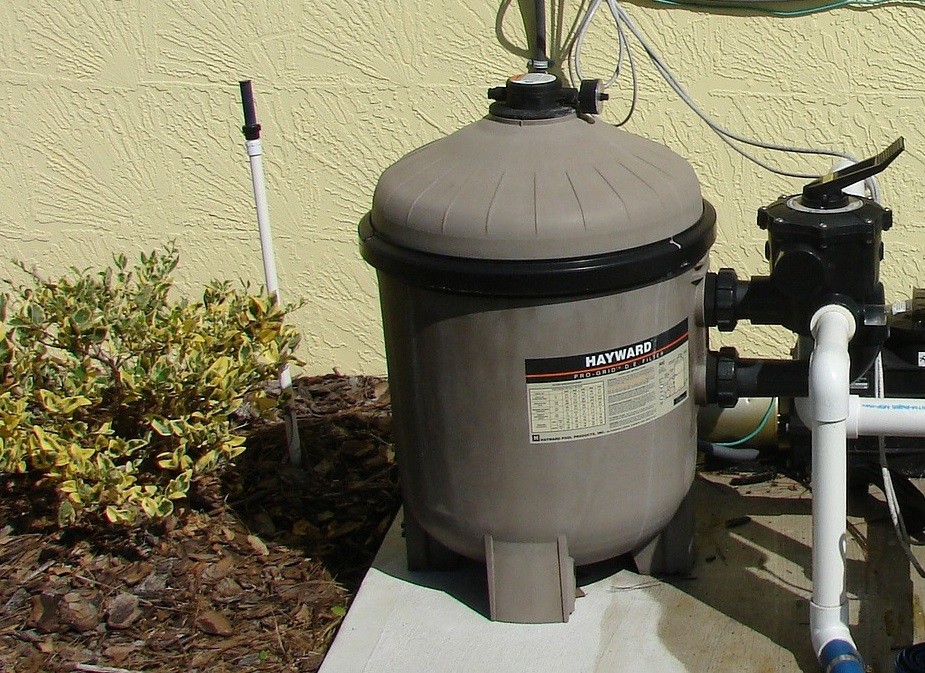
Slowly remove the upper part of the tank filter once you have completely removed the clamp. Removing the cartridge will depend on the model of your filter. The filter model might contain a single large filter element or four small filters.
A gentle rocking motion while lifting might help you to dislodge the filter elements. Make sure to remove all filter elements from the tank and put them aside for cleaning. Those filter tanks that have one large part will be easier to remove.
Step 4: Check Cartridges for Wear and Tear
Pool cartridge filters are a popular low-maintenance system to keep your pool clean. It requires regular cleaning, and replacing your pool cartridge filter is important to look great and ensure that the pool user stays healthy.
Every time you execute a cartridge cleaning, it is better to inspect thoroughly for any damages like cracks in the plastic housing, tears in the creases, and other signs of wear.
The easy way to determine if it’s time to replace your pool’s cartridge is by noticing that your pool’s watercolor, smell, and appearance are inconsistent. Also, if you see that your pool is not clean as it used to be.
Therefore, you must check daily your pool cartridge for small tears because this may reduce the capacity to filter the water. Replacing a damaged filter is recommended for it to achieve the best performance.
Step 5: Remove Debris from the Cartridge Material

The most common approach in cleaning the cartridge is by using water. You can use a garden hose and spray all the dirt and debris of the filter down. After about 10 to 15 minutes of spraying, it will rinse the debris away to the folded cartridge pleats.
You may clean your cartridge starting from the top to the bottom. After you clean the whole cartridge filter, you can turn it upside down and repeat the cleaning procedure.
If you have a small pool and small cartridge and are not too dirty, holding your thumb on the end of the hose will be enough to create a water pressure that can clean the filter thoroughly. However, you will need a hose with a nozzle to produce a strong water spray that will clean enough or wash your pool’s cartridge filter.
In many cases, you find that the regular hose nozzle cannot remove all the debris of your cartridge, try to use a high-pressure model tailored for household projects. You can purchase this product at local hardware or through online stores.
Some pool owners always wanted to save water by removing the dirt from the cartridge material with an air compressor because it produces a concentrated stream of air.
In some ways, you may use other methods to clean your cartridge if you find it difficult to remove the debris by using water and an air compressor. One way is increasing the cleaning with a gentle brush or other machine designed to remove dirt from the cartridge filter.
A Word of Caution
Since brushing can remove all debris into your cartridge material, do so barely. Brush only the hard spots where the dirt is, and slightly touch until the dirt is removed.
Another strategy in allowing dirt to be removed from the cartridge is dirt-busting. Some pool owners discover that dry debris easily comes off with a few shakes of material. And this process can also be used for day-to-day cleaning to save water, but shorter rinsing is still needed to flush out the remaining dirt.
If you choose for dry method, you can put your cartridge outside in your garden. Do not expose too much under the sunlight. It may result in deterioration of material due to overexposure. The required time for the cartridge to be exposed to UV radiation is only a few hours; it helps kill any algae on the filter material.
Step 6: Degrease or Deep Clean the Cartridge
All methods illustrated above can take away the debris from the cartridge. However, these procedures are not enough to manage substances such as algae, sweat, sunscreen, and body oils that bleed into the cartridge material.
If many swimmers use your pool, it is better to have a daily routine in cleaning or deep cleaning from time to time. This added step will give you a more thorough cleaning of your filter to ensure its efficacy.
The most common products used by pool owners are pool degreaser or cartridge cleaners. These products can be purchased at hardware, pool equipment and supplies, and online stores.
How to Use? Directly spray the product onto the cartridge. Make sure all surface areas are covered between the pleats. Follow the recommended time in using this product, then thoroughly rinse it off.
Step 7: Reassemble the Filter Tank

After cleaning the entire cartridge, return and assemble all the attachments onto the filters. Ensure the portion of the filter tank is firmly returned into place, then firmly close the O-ring. You may also use the other clamping procedures in assembling the filters.
Next, turn the air release valve back into a close position, turn on the pump, and thoroughly check that everything is well functioning.
Step 8: Test the Filter’sFilter’s Air Pressure
Once the pump is running, emit the excess air in the system by opening the filter’s air relief valve. If you notice the water continuously spray out to the valve, this means there’s no more air in the system.
You must check after cleaning to ensure your filters are in the proper range.
Maintaining a well-cleaned cartridge filter will keep your pool water pleasing to the eyes, healthy and safe.


